Wago OPC UA and NodeRed
Table of Contents
Wago OPC-UA and NodeRed
In this lab session, the Wago PLC will be connected to NodeRed over OPCUA.
Please prepare the preparation file, before attending tha lab session.
Preparation:
OPCUA:
OPC-UA enables standardised, secure and reliable exchange of data in the industrial automation space and in other industries. (opcfoundation.org)
In this lab-session, we will use this communication interface to send temperature data from a PLC to a NodeRed Dashboard, and to control the FESTO MecLab stations from a remote dashboard.
What is a NodeID in OPC-UA communication?
Make yourself familiar with UAExpert, you can use this short introduction -> OPC-UA client — Automatisierungstechnik und Integrierte Managementsysteme (83310) 2023, Prof. Jörg Wollert (FH Aachen) documentation.pdf
NodeRed:
The Dashboard that will be used, will be realized in NodeRed. NodeRed is a low-code environment, built on node.js.
Make yourself familiar with NodeRed! To do so, use this guide -> 2. General information — Online Content documentation.pdf
You can fing more information about NodeRed here -> NodeRed_SmartHome.pdf
Lab session task:
Reading Temperature and displaying it on a remote HMI
Reading temperature with Wago
- Open the Project where you controlled one of the FESTO MecLab stations in Wago E!Cockpit.
- Find the IO Card that enables measuring temperatures (look in the tab "DeviceStructure").
- What does RTD mean?
- Create a variable in your main Program, where the temperature from the RTD card is saved.
- Which datatype does this variable need to have ?
-
Check in DeviceStructure which datatype the IOCard is providing!
-
- Map the variable from your program with the hardware!
Enabling OPC-UA and define shared variables over OPC-UA
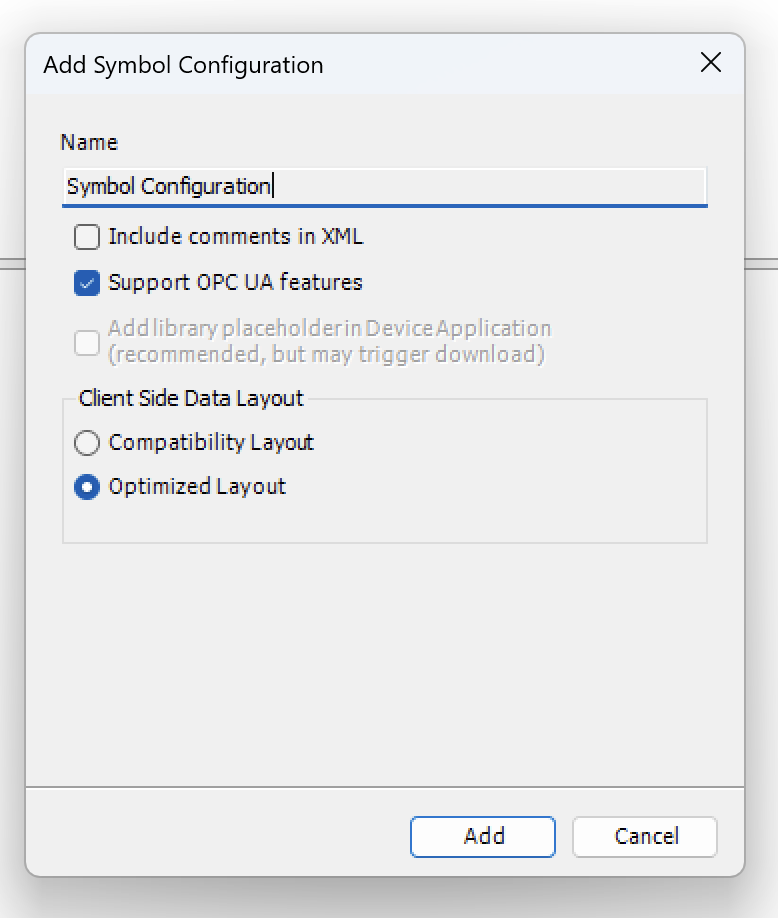
- Create a new SymbolConfiguration. (Right click on Application > Symbolconfig)
- Enable OPC-UA capabilities.
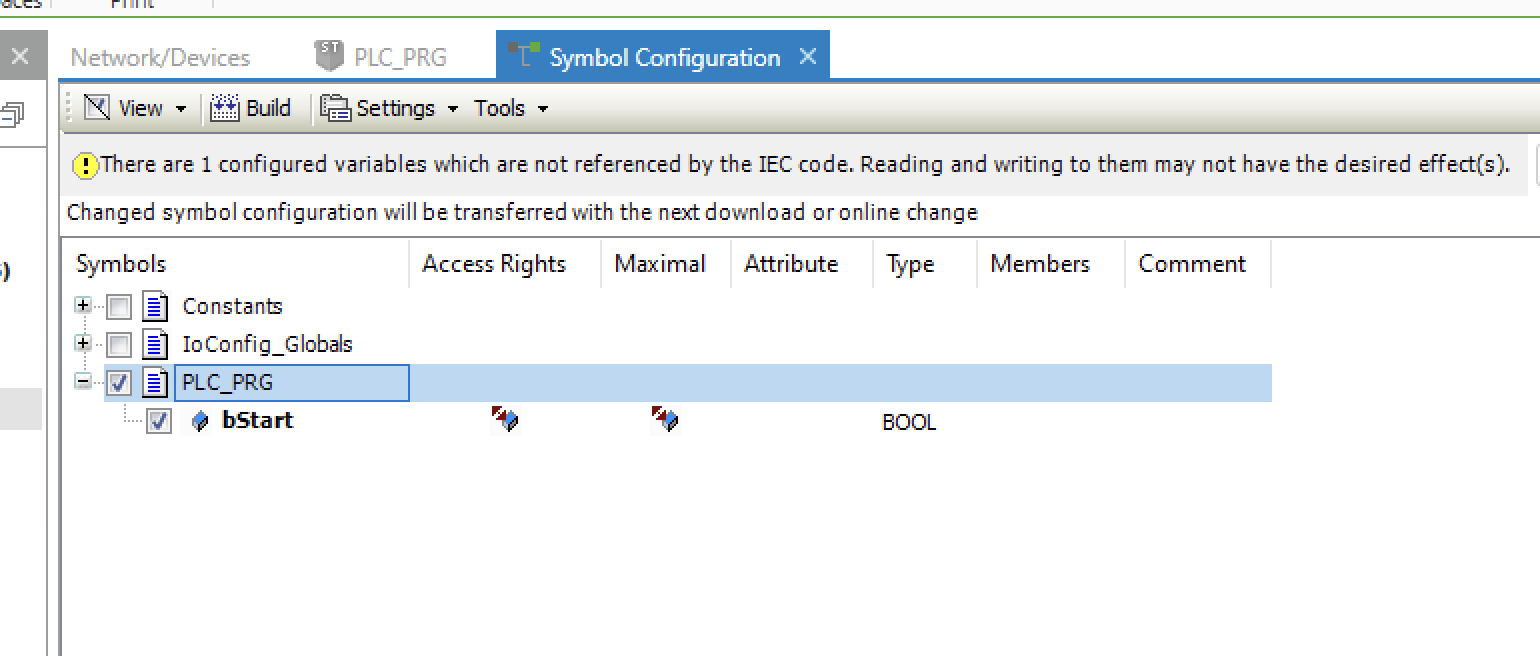
- Build your project by pressing the build buttone. This is done, so the variables that you chose are reachable via OPC UA.
- Choose the variable that you want to be able to be accessed through OPC-UA
- Download and start your Code on the Wago PLC.
Reading and writing Variables over OPC-UA using UAExpert
UAExpert is a so called OPC UA Client. This software can be used to acces the variables that our Wago PLC is providing via OPC UA. To control and read variables via UAExpert in the Wago PLC, follow these steps:
-
Open UAExpert
-
When asked on first opening, enter
FH-Aachenas organisation, and click OK. -
Add a Server to the configuration. (Server - right click - Add)
-
Under Custom Discovery add the Wago OPC-UA Server.
- Change the authentication settings to username. (Username: admin)
- Give the config a suitable name
- The URL of the Server is
opc.tcp://"YOUR PLCS IPADDRESS":4840 - Double click on the added server, the double click on the WAGO PLC, then click on the
authentication with noneServer. -
If UAExpert asks if it should change the IP-address to the hostname of the PLC, click no!
-
When connecting to the server for the first time, a "BadCertificateUntrusted" certificate can appear. Click "Trust Server Certificate" to continue.
-
Click the connect symbol in the second most top menu bar.
-
username: admin, password: wago
-
Guide Through the Wagos OPC-UA Server to find yous shared variable. Determine its NodeID as you will need that later!
Displaying Variables in Node-Red
- Start Node Red by typing
node-redin your command line of the PC. - Open the nodered editor in your browser via 'localhost:1880'.
- Using the Palatte Manager, check that the OPCUA-Nodes and the Dashboard Nodes are installed.
- If that is not the case, install the
node-red-contrib-opcualibrary. (Link)
- If that is not the case, install the
If the installation of node-red-contrib-opcua is failing, copy the manual install link from the node-red website. Open a CommandLine, type "cd .node-red" and insert the install npm command. Press enter.
-
Look for the OPC UA Client node, and insert it into your node red panel.
-
Then Endpoint is your PLC
-
In the OPC UA Client node, create a new OPC-UA connection. Remember to enable authentication via password.
-
Try to read your shared variable from OPC-UA.

change the debug node to diplay the whole message object to get a more clear overview. Chose the correct function (READ, WRITE, ...) in the Client Node.
-
Deploy your flow and check if the variable can be read correctly!
-
Check if the dashboard library is installed:
node-red-dashboard -
Insert a Gauge Node to display the temperature on a dashboard. To do so, you need to enter the gauge Node and create a new dashboard and Tab Group.
-
Deploy your flow, and access your dashboard via
localhost:1880/ui
Control your Festo station with NodeRed over OPC-UA
In this step the Festo MecLab stations shall be controlled and visualized in a NodeRed dashboard. The interface from NodeRed to the Wago PLC should be OPC-UA.
- Open your FESTO MecLab project in Wago E!Cockpit.
- Add a variable 'xStart' that needs to be TRUE, so the MecLab station can work. This variable should be accessible through OPC-UA.
This variable is the same as the simulated button that we made in the last lab session.
- Using UAExpert, determine the needed NodeIDs of the variables, that you want to access.
- In the NodeRed Dashboard, add a 2 buttons that will write the xStart variable. The start button should start the MecLab station, the stop button should stop it.